Saturday, October 29, 2011

Green Halloween

It's finally here! The moment I've been waiting for to show off the costume I worked so hard on has arrived..... Too bad Little Man decided he didn't want to wear the costume, and would scream anytime it came near him. Yep. That's right. I was so excited about it, and he could have cared less. But we still had a good time. 

This afternoon, we went to Whole Foods Market for Green Halloween Tampa (an event that promotes a healthier alternative to halloween). It was a cute event. While they did pass out a few treats around the store, it wasn't all that I had envisioned. There were four stations in the store, each time we stopped our Whole Foods guide would talk to the kids about environmentally friendly topics (recycling, energy saving, etc), and then give them a "treat" (fruit, Horizon Organic Milk boxes, granola bars). I think I was expecting a little more "trick-or-treating," with healthier treats. C wasn't too interested in all the talking, but he did have a great time at the Stretch-N-Grow booth.


The shirt was the only part of the costume I could get him to wear. And believe me, it was a battle just to get that on him.

Hubby finally got C to put the rest of the costume on when we got home. He had to convince him to take a picture with Mickey, and bribe him with candy and games. 


Are there any fun fall/halloween festivals that you and your family are going to this weekend? 


Play-dough Pumpkin

For Little Man's birthday, my amazing brother gave him Eco-dough by Eco-kids. It was probably the best gift he could have ever received! We make our own homemade play-dough, but this stuff takes homemade to the next level. The dough is made from all natural, non-toxic environmentally friendly ingredients; and I really feel good about C playing with it. 

Yesterday was a yucky rainy day; so, of course, it was the perfect day to bust out the eco-dough. We picked up this Little Man size pumpkin earlier this week at a Halloween event we went to. We couldn't carve it, and I really wasn't feeling painting it. So I was trying to think of different things we could use to decorate the pumpkin. 


While playing with the eco-dough, we were inspired to give our pumpkin a face. This was my side. 


And this was C's side. 

What a brilliant idea this was! Not a lot of mess, and lots of fun coming up with different faces. I let it dry over night, and now we have a cute little pumpkin (that will last much longer then our Mickey pumpkin that we carved last weekend)

Have you come up with any "new" pumpkin decorating ideas for little ones?

Also, among the many really cool products Eco-kids makes, we personally love their eco-crayons (another awesome gift from my amazing brother). They are handmade with natural, and organic plant and vegetable extracts. These products can be kind of pricey, but I did found them on Amazon for a bit less. But really, I would spend the money on quality, eco-friendly products, that I feel are safe for my child to play with. 

Disclaimer: Thoughts and opinions expressed about eco-kids products are purely my own. This blog receives no payment or other compensation for reviews of products and services. Unless explicitly stated, I have no affiliation or relationship with the supplier of a product being reviewed. 

Friday, October 28, 2011

Furniture Makeover: Shabby Chic Step Stools

I hope everyone is having a fabulous Friday so far! I have been enjoying a few hours sans my child. So I have had a chance to finish these lovely step stools.

Hubby and I have been looking for step stools to go in our two bathrooms for a couple of months now. The only criteria I had, was that they had to be wooden. Nothing against the plastic variety, I just don't think they fit in with the decor in our home. 

After months of searching, we finally found these at a yard sale last weekend.


As you can tell by the size, these step stools are obviously for Little Man. However, the beautiful pink hearts are not the first choice for a little boy. 

So, of course I had to spruce them up a bit to fit in our home. I went through my bin of paints; which consists of only four colors, primer, and chalkboard spray paint. And settled on this greyish blue, that I absolutely love! It was either that or a lime green; and that color doesn't really go with anything in either bathroom.


Little Man has a dresser, toy chest, and mirror painted in this color. That shows you how much I love it. Or it shows how cheap I am when it comes to buying more paint. I definitely like to get as much use out of what I have before I go out and spend money on more colors.

Anywho, for $6 we got two freshly painted, brand new to us step stools. I think that's pretty darn good considering all the other stools we were looking at ranged from $10-$25 a piece (and those were craigslist prices)

Happy Painting!

Thursday, October 27, 2011

In the Kitchen - Caramel Apple Bites

Today, is my SAHM Group Halloween Hot Dog Roast. We all usually bring something to share, and of course I waited until the last minute to figure out what I was going to bring. Then, I remembered these caramel and candy apples bites that I saw on Pinterest, and thought I would give them a try. 


Luckily, I bought these caramels a couple of weeks ago when they were BOGO at Publix. I followed the instructions on the back of the package for the caramel apples. The only exception is that I didn't use a whole bag. Mainly because I had already eaten a lot of the caramels; but also because I was making bite size pieces, so I didn't need that much anyway.

All you need is 2 Tbs of water, and the caramel pieces. Melt the caramels over low heat in a medium size pot. 


I cut up 4 small/medium size Granny Smith apples into bit size pieces. And removed the skin from half since there were going to be kids eating these.  Once the caramel was melted, I dipped the pieces in, then set on a lined baking sheet to cool, and placed in the refrigerator for an hour. 


I printed out a few wicked candy apple clip art  from Mrs. Martha Stewart.com as well (like the cool mom who made these the right way from the other blog). They looked and tasted amazing when I first plated them. Then, they sat out for an hour, and the caramel melted and stuck to the plate. So awesome. I didn't even take a picture of that disaster. Check out Try It Mom, to see a better result than mine. 

So, I failed at this one, but you can't win them all. And they tasted pretty amazing either way!


Plus, this little cutie couldn't get enough of 'em.

Wednesday, October 26, 2011

In the Kitchen - Sweetly Salted Pumpkin Seeds

Over the weekend we did some pumpkin carving. It was lots of fun! We carved this cute Mickey design. 

Carving is fun, but my favorite part of carving pumpkins is toasting the seeds! This is one of my favorite recipes for pumpkin seeds. I prefer a bit more sweet than salty, but that's just my sweet tooth coming out.  

Ingredients:
~ 2 cups fresh pumpkin seeds, rinsed and patted dry
2 Tbs unsalted butter, melted
3 Tbs granulated sugar
1/2 tsp kosher salt
1/4 tsp ground cinnamon


> Spread seeds on a rimmed baking sheet. Bake at 300° for 50-60 minutes, until dry throughout. {Or I just left mine out overnight to dry}


> In a bowl, toss the seeds with the melted butter, 2 Tbs sugar, salt, and cinnamon.


> Return the seeds to the rimmed baking sheet, and toast in a preheated 350° oven, for 10-15 minutes, tossing occasionally.


> Remove from oven and let cool. Sprinkle with remaining 1Tbs of sugar (if desired).


> Store in an air tight container; and enjoy!

Hubby doesn't like pumpkin seeds, so he won't eat these. But Little Man loves them!

Do you have a favorite pumpkin seed recipe to share?

Happy Baking!

Eversave Halloween Treat!


I have so many things to write about, but I just haven't had a minute to sit down! I just wanted to quickly share this Eversave Halloween treat. 

For the next 2 days, Eversave, is offering $5 off any save with the promo code SPOOKY. They have great deals! In fact, last week I scored the Photobin deal ($28 for 60 greeting cards or $10 for 20), and already ordered our family Christmas cards. 

If you've never heard of Eversave, it is a great daily deal website, that offers local and nationwide deals. They are always running awesome promos like this, which is an extra way to save on top of the discounted prices! Plus, you get a free $3 new member credit! So sign up today!


So check them out!

Friday, October 21, 2011

In The Kitchen - Parmie Pizza Pull Aparts

My family loves pizza; but sometimes, I get a bit tired of it. I found this great recipe on Pinterest yesterday for Pepperoni Pizza Monkey Bread.So I decided to try it out for dinner. 

There was this awesome pizza place that I used to go to growing up, that had these amazing Parmie Puffs. They were basically small rolls smothered in garlic butter and parmesan; served with marinara sauce for dipping. Definitely not healthy, but tasted sooo good. This is where the "Parmie" part of my recipe comes from. 

For the most part, I followed the recipe from the blog, Confections of a Foodie Bride. I just added an extra step/ingredient, and I halved the recipe (only because I didn't thaw out enough dough; but 1 lb of dough is plenty for 2 adults and 1 child).  The extra step makes all the difference though. Just the aroma that filled the house while these were baking brought me back to my childhood.

Note, that I made half with pepperoni and half just cheese. I was thinking of filling some with olives or peppers as well, but Hubby doesn't care for either of those things, and I figured it would be too difficult to tell them apart. Next time, I'm going to try it though. I think I could just put the ones with pepperoni on one side of the pan, and the ones with "my" fillings on the opposite side. The great thing about this recipe, is that you can customize it to your families taste. 

Ingredients
2-3 Cloves Garlic, thinly sliced (depending on size and taste preference) 
5 Tbs Butter
1-2 lbs Pizza Dough (store bought or homemade)
6 oz Mozzarella Cheese, cut into small cubes
Slices of Pepperoni (or other fillers)
Grated Parmesan Cheese (~3 Tbs)  
2 cups Marinara Sauce, warmed, for serving

> Heat garlic and butter in a saucepan, until garlic is just turning brown. Remove from heat. 
> Brush the inside of the bundt pan with the garlic butter.
>Pull off balls of dough, and flatten. Top with a fillers; in this case, a slice of pepperoni, and a cube of cheese. 


> Wrap dough around your filling, and pinch to seal.
> Lightly brush each ball with garlic butter, and place in the pan.
> Repeat until all the dough is used.
> Cover and let sit for 30 minutes, while you pre-heat the oven to 400°.
> You will end up with ~ 2 Tbs of garlic butter. Before placing in oven, drizzle about 1 Tbs over the dough, and sprinkle with the parmesan cheese. (I think I used about 2 Tbs, I probably would have used more if I had enough though).
> Bake for 30-35 minutes, until golden brown.
> Let cool for a few minutes (a step I missed); then invert onto a plate.
> Sprinkle the top with the remaining parmesan. Serve with warm marinara sauce. 
{Side-note: I also served the remaining bit of garlic butter as a dipping sauce. So yummy. Can you tell how much I love garlic and butter?} 


This was so easy to throw together; definitely a good option for what I like to call "lazy cooking days."

 Try it out, and let me know if you changed the recipe at all! I'd love to hear any variations. 


Wednesday, October 19, 2011

Little Man's Halloween Costume, part 2

Woo Hoo! The shirt is finally finished! I am finally done with this costume! He better LOVE it!


I was going to do the logo on the back as well. But I just don't have it in me to paint that out again. The shirt may end up being a bit too big on C, but he'll just have to live with it. I went to about 6 different stores in search of a toddler size plain white t-shirt, before settling on a child's small Fruit of the Loom from Wal-Mart. 

I used a Stencil Spray Paint in "sliver glimmer," to paint the whole shirt. Then used fabric paint and puffy paints for the logo. I'm not totally happy with the color of the lemon and lime. But it will have to do. {Side-note: It is pretty funny that the colors of the paint I used were called Lemon Matte and Lime Matte, but look nothing like the color of a lemon or a lime}.

I am sooooo happy to be finished with this, and can't wait for next weekend! I'll post pictures of Little Man in costume at Whole Foods!

Anyone else making a halloween costume this year?


Tuesday, October 18, 2011

Little Man's Halloween Costume, part 1

Last month, I talked about Little Man's Halloween costume being my top priority craft project. Well, I certainly have not been acting like it is number one on my list of things to do. The last few weeks I've been side tracked with crafts I'm putting together for my church's nursery, and a host of other projects that have come up. But I have finally come around to finishing it up. 

Little Man will actually be wearing 2 different costumes this year. The one I have been working on is for trick-or-treating at Whole Foods for their Green Halloween. He is going to be an aluminum can inside of a recycling container. I was so proud that I came up with this idea all on my own! And aside from the t-shirt and spray paint I had to buy, all the other materials have come from around our house.


This is the "recycling container" that he will wear. I cut the bottom out of this cardboard box we had lying around; spray painted it blue, and used puffy paint for the writing. My mom drinks Sprite Zero, so those are the cans that I hot glued around the inside. (He will be dressed as a Sprite Zero can as well; the shirt is almost finished). 


I used cardboard from a cereal box and aluminum foil to create the "pop top" hat. 

I should have the shirt finished tomorrow; and can't wait to share it with you. Next weekend, I will be able to share the complete finished product when we go trick-or-treating!  So be on the look out for my adorable little guy in costume!

Great Publix Deal

Stouffer's Family Size Entrees, $3.99
$1/1 Any Stouffer's Family Size entree, exp. 12/31/11
$1.50/1 30- to 96-oz. Stouffer's Frozen Entree (Target Printable)
Stack (1) $1/1 MQ with (1) $1.50/1 SQ, pay $1.49!!!


This is an amazing deal! These are regularly priced at $6.99! Hubby was extremely happy about this. He LOVES lasagna, and I rarely make it homemade. Although I don't eat Stouffer's, he really likes the new Farmer's Harvest meals. He says, "it tastes fresher than the other stuff."

So go get them before the deal is gone!

Monday, October 17, 2011

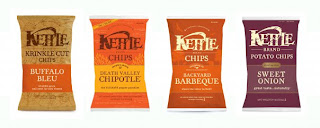
Free bag of Kettle Brand Potato Chips!

Head over to the Kettle Brand Facebook page, Like them, and click on Free Chip Giveaway to grab a free bag of Kettle Chips! Hurry, this offer is limited to the first 30,000!  

Friday, October 14, 2011

Holiday Crafts - Jar-O-Lanterns

Day                            Night 

Remember those mason jars a bought a couple weeks ago when I went to some yard sales with Hubby? Well, here is the project I've been working on with them.

I was originally planning on turning them into hanging lanterns for our deck. But, while flipping through this month's Southern Living, I found this great idea (click for the tutorial)

They were so easy to make; I even had Little Man, and my 7 year old cousin helping to paint. 

A couple tips:

1) Don't use Tempura Finger Paints. 
This is the only orange paint I had in the house, and I was being too cheap (and kind of lazy) to go out and buy a different kind. It worked well enough, bought I had to do about 3 coats; and it took forever to completely dry between coats. Also, being outside in our humid weather makes them kind of sticky.

2) It might be easier to print out a face template
I tried both black paint and sharpie, and wasn't 100% pleased with how they turned out (up close you would be able to see what I'm talking about). You can find templates here. These come from Ms. Martha Stewart.com. Her version of the Jar-O-Lantern is a bit different (you paint the inside instead of the outside) than Southern Living's, but the templates will work just the same. 

Happy Crafting!

Greeting Card Recycling

On one of my favorite couponing/freebie sites, The Freebie Junkie, I found this great post about recycling old cards, and wanted to share it with you all. 

I don't know about you, but I receive greeting cards for all sorts of random occasions. The sentimental hoarder in me wants to store them away in a neat little memory box to keep forever.  While the busy stay-at home-mom/has no spare time to organize/throw it all away part of me wants to just toss them. So this seems like the best compromise for my split personality. 

St. Jude's Ranch For Children will take my old, used greeting cards, recycle them, and turn them into new cards which they sell to support their program. Making my home a little less cluttered, and helping out a good cause at the same time! How fabulous is that?!

St. Jude's Ranch For Children  has served abused, abandoned, and neglected children and families for more than 40 years. They provide a safe, nurturing home, and therapeutic residential treatment services to more than 1,000 children in Nevada and Texas. 

They now accept used, all-occasion cards year round!
St. Jude's Ranch For Children
Recycled Card Program 
100 St. Jude's St.
Boulder City, NV 89005

*I noted on the website that they are in need of BIRTHDAY and THANK YOU cards. 

Wednesday, October 12, 2011

In The Kitchen - Stuffed Apples

Every month or so, I get together with a few friends from my Mom's Group for a recipe exchange. This month was Fall themed (obviously), and I made these amazing stuffed apples. I found a few recipes on Pinterest, and combined them to create this one. {Side-note: if you haven't visited Pinterest before, you should! It is seriously addicting. If you need an invite, let me know, and I'll send you one}. 


 Ingredients:
1/3 cup Brown Sugar
1/3 cup Walnuts, chopped
1/3 cup Dried Cranberries
1 tsp Cinnamon
1 Tbs Trans fat free butter or margarine
6 Gala apples, cored
1/2 cup Apple Juice

Pour apple juice in the bottom of a crock pot, and place washed/cored apples on top. Combine brown sugar, walnuts, cranberries, cinnamon, and butter. Stuff apples. Cover. Cook on high approx. 2 1/2 - 3 hours or low 4-5 hours. 


The end result! They were a hit at my MNI (Mom's Night In)! I cooked mine on high for 4 hours, then just turned my crock-pot to warm until I left for my friend's house (2 hours later). 

Notes:
1) You can use as many or as few apples as you would like. Add about 2 Tbs brown sugar per extra apple. 

2) The dried cranberries can be substituted for raisins; or you can use both.

3) If you don't keep apple juice on hand (or just don't want to use it), cider can be used; or this site suggested 1/2 cup water mixed with 2 tsp vanilla. I used 1 pouch of Honest Kids Organic Apple Juice, because that is what I had available.

4) The butter can be omitted. 

These would make for a great after school snack as well. I'm thinking there are so many possibilities of things to stuff in these apples...so get creative! Let me know how you like them, and if you changed up the recipe at all. 

Tuesday, October 11, 2011

Yay For Mail!


I love getting goodies in the mail! 

Today, my Target beauty bag arrived! A month ago, when I filled out the form to request one, I didn't think it went through...so I was happily surprised today to receive one. 

Another plus, the bag is a lot cuter and bigger than last year's!

Did anyone else get one?

Shipwrecked


Oh the joys of boys. 

This Pirate Ship Playhouse from Box Creations was Little Man's birthday present. His birthday! The one we just celebrated less than 3 weeks ago! It is now heading out to the recycling bin.

So, the lesson we have learned is....Little Man can only own toys made out of materials that can be jumped on, fell on, and run into without falling apart.

Update: I was just reading the Disney Family Fun magazine, and this Pirate Play Ship was ranked #9 on their list of this years top toys! 

Sunday, October 9, 2011

Wonderful Weekend

Rain rain go away...and don't come back for awhile. 

The rain has hijacked our weekend. But we still have been able to have lots of fun. 

Yesterday, Hubby went out on our friends boat to watch the Red Bull Flugtag. So Little Man and I were left to entertain ourselves all day. My Mom and I decided to take him to the fall festival at Horse Power For Kids. If you are local and are looking for a fun family activity...this is not it. No, I'm kidding...sort of.  


There were pony rides, a small pumpkin patch, a petting zoo, face painting, and a couple crafts and games. I thought it was a bit over priced for what was offered; but you did get a hot dog and drink with the price of admission. The games, face painting, and crafts you had to pay extra for though. In general, it was a wholesome, good time. And C was entertained for a couple hours, so that made me happy. {Side-note: Horse Power for Kids, also offers riding lessons, and trail rides for ages 6 and up.}

Last night the rain started, and just hasn't stopped. 


 Sooooo, we decided to put on our rain gear and play in it! And by "we," I mean I decked Little Man out in his Kidorable rain gear, while I stood out there getting soaked. He also has a backpack that matches, but I didn't think it was really necessary to put that on him too. Although, it would have been cute. 


And on to another great rainy day activity.... re-upholstering chairs! Wooo Hoooo! Oh, and these aren't my chairs (mine are still sitting outside calling my name, but they can wait a little while longer). Because, today, my grandmother's bar stools were more important. The one on the left is the old fabric, and the right is new. I know. I couldn't tell the difference either. But she was happy with the outcome, so that is all that matters. 

I hope you all have found awesome things to do over the weekend too!

Thursday, October 6, 2011

The Married Life

Thanks to The Dating Divas, Hubby and I no longer have to play the "read my mind" game. Thanks to the hint box, we write down things we like or want to do with each other and put them in our box. When we want to do something nice for the other person, we just pick something out of the box. So simple!


Visit The Dating Divas to download a printable tag for your box. I didn't end up using it because my boxes are smaller than the ones they used. So I picked up some letter stickers, which worked just as well. 

Have fun with this one!

Tuesday, October 4, 2011

Memories Memories Memories


I tend to hold on to little mementos from the past. Hubby calls it hoarding; I call it being sentimental. I've gotten better over the years (i.e. I'm not still holding on to notes that my friends wrote me in high school). But I've kept these keys from our previous residences. When Hubby and I purchased our first home a little over a year ago, I wanted a way to display what has lead us to this point. We've actually lived at a couple of other places, but that was with family, so I didn't count that because it wasn't really "ours."

I picked up this shadow box on clearance at Michael's, ohhhh about a year ago (<--- again with postponing projects for an extended period of time). I found some scrap card stock I had lying around, glued on the keys, wrote the addresses out, then popped it in the frame. Super easy. I don't know why I take so long to get things done around here. Though, I think it might have something to do with the Little Man.

What creative ways have you displayed your memories?

Happy Crafting!

Monday, October 3, 2011

DIY Chalkboards

stumbled upon this amazing website, Fellow Creatives, and found this great idea to turn old picture frames - or, really anything with a flat surface - into a chalkboard. A friend of mine has a chalkboard made out of a silver platter, and I have always thought that was such a great idea; but it never dawned on me to use an old picture frame. I totally had one of those "why the heck didn't I think of this before" moments.


I picked up this picture at a rummage sale for $2 about 6 months ago. 

If you haven't already figured it out, I have a bad habit of buying things with good intentions of turning them into something spectacular, and taking my sweet time to follow through. I did the same thing to what are now our dining room chairs - it only took me about 8 months to finish them (to be fair, they were in need of a lot of work, and there were other extenuating circumstances). 

At the time I bought it, I thought it was a neat picture, and planned on hanging it up somewhere. Then, buyer's remorse set in, and for months I would look at this and say "What was I thinking? I have no use for this." 

Anywho, I taped it off and put paper around the edges to protect the wood. Picked up a bottle of Chalkboard Spray Paint, and finally turned it into something useful.


Ta Da! 

I decided to paint/de-stress the wood so it would match my dining room chairs (I'll have to post a picture of those - I love how they turned out), since it will be hanging near them. 

A couple tips:

1) Paint the frame first, then spray on the chalkboard paint.

Fellow Creatives suggests doing this the other way around, and I found it to be more difficult to paint the frame. I ended up having to add a second coat of chalkboard paint, and that didn't work out too well. Which leads too....

2) If you have to add a second coat of chalkboard paint, make sure the surface is completely clean of any small pieces. 

You would think this goes without saying, but I thought my surface was "clean enough," and ended up messing up 3 sides of the outer portion of the glass. You can't tell by this picture, or if you are standing far away; but if you get up close you can tell where I had to wipe the paint away and start over. 

P.S. The bench that the chalkboard is sitting on, is also a rummage sale find. Picked it up for $10, and just reupholstered it with some fabric I found on clearance at Calico Corners.

In The Kitchen - Meringue Cookies


I had some leftover meringue from the pie I made over the weekend, so I decided to whip up some cookies! They are a little slice of heaven! Little man loves them (but what doesn't he love, really?). 

They are super easy to make. If you made the Lemon Meringue Ice Cream Pie, just use the extra meringue that you will have. If you didn't make the pie, here is the recipe for just the meringue topping used for the pie.

Preheat your oven to 225ยบ. Line 1-2 baking sheets with foil (I used a Silpat - love it!), and drop meringue by spoonfuls 1 inch apart. Bake for 1 1/2 hours. Turn the oven off, leave the door open, and let cool completely. 

I found a recipe that called for sprinkling the tops with peppermint - I was going to do this until I realized I had eaten the last of the peppermints earlier today...ooopsies. :)

Happy Baking!

Sunday, October 2, 2011

Wonderful Weekend

Sadly the weekend is coming to an end - it sure has flown by. The weather is finally starting to cool down, and we have spent most of our days outdoors. My mom was so awesome to volunteer to watch the little man so Hubby and I could go to a few yard sales.  

I'm going to fix up the table to sell (at least that is what I told Hubby I was going to do), and I have a few ideas of what to do with the mason jars. Those projects will maybe be done in the next few weeks, so look out for that! Little Man has been obsessed with the pitching net since we brought it home. I was ecstatic to find the Big Big World Atlas....I had one when I was growing up and I'm thrilled that I scored one for C (aka Little Man).


This, by far, was my favorite find; but of course hubby vetoed it. However, I totally think it describes our house quite nicely.


I also made this Lemon Meringue Ice Cream Pie. Hubs has been asking me to make it for a few weeks now, and I finally got around to it. I totally screwed it up though - forgot to temper the eggs, didn't layer the ice cream and the lemon curd - but it still turned out great. You can find the recipe on the Southern Living website. 

I hope you all had a wonderful weekend as well!